
This tutorial will guide you in deploying a WP application in Kubernetes using the GitLab repository and a remote server with a MySQL database. Also added a manifest for Kubernetes cron job for data backup to AWS S3 bucket.
Create a repository on GitLab
Put the source of code of WP site or add folders with content to the repository from the archive: wp-content/themes, wp-content/plugins, wp-content/uploads.
Configure the CI/CD variables for the project.
You must have a Kubernetes cluster and the kubectl command-line tool that must be configured to communicate with your cluster.

Variables :
– WORDPRESS_DB_HOST
– WORDPRESS_DB_USER
– WORDPRESS_DB_PASSWORD
– WORDPRESS_DB_NAME
– WORDPRESS_TABLE_PREFIX
Variables :
– DB_HOST
– DB_USER
– DB_PASSWORD
– DB_NAME
Ceate Dockerfile
FROM wordpress:6.1.1-php8.0-apache

ADD wp-content/themes /usr/src/wordpress/wp-content/themes
ADD wp-content/uploads /usr/src/wordpress/wp-content/uploads
ADD wp-content/plugins /usr/src/wordpress/wp-content/plugins

ADD ./backup.sh /opt/scripts/

EXPOSE 80
At the first download, the files copied to the /usr/src/wordpress/ folder will be automatically located in the /var/www/html/ folder and belong to the www-data user.
The owner of the /var/www/html/ folder must be www-data only, otherwise, it will not be possible to download and update themes, plugins, and files through the WP editor.
But since we will be using persistentVolumeClaim we will need to copy all the files from folder wp-content/themes, wp-content/uploads, wp-content/plugins again after creating Persistent Volume Claim.
Create deployment.yml manifest and other files
The following manifest describes a WP deployment. PersistentVolumeClaim with mounts /var/www/html/wp-content/uploads, /var/www/html/wp-content/plugins, /var/www/html/wp-content/themes are necessary so that folders and files that were added not to the repository do not disappear when the pod is recreating.
---
apiVersion: extensions/v1beta1
kind: Deployment
metadata:
  name: ${PROJECT_NAME}
  ...#Add lines depending on your Kubernetes settings
    spec:
      containers:
      - name: ${PROJECT_NAME}
        image: ${REPOSITORY_IMAGE}
        ports:
        - containerPort: ${CONTAINER_PORT}
        ...
        # Make sure, that appropriate subpaths exists in shared volume
        volumeMounts:
          - name: ${PROJECT_NAME}
            mountPath: /var/www/html/wp-content/uploads
            subPath: "uploads"
          - name: ${PROJECT_NAME}
            mountPath: /var/www/html/wp-content/plugins
            subPath: "plugins"
          - name: ${PROJECT_NAME}
            mountPath: /var/www/html/wp-content/themes
            subPath: "themes"
      volumes:
        - name: ${PROJECT_NAME}
          persistentVolumeClaim:
            claimName: name-pvc-claim

---
apiVersion: v1
kind: PersistentVolumeClaim
metadata:
  name: name-pvc-claim
spec:
  volumeName: ${PROJECT_NAME}
  storageClassName: nfs
  accessModes:
    - ReadWriteMany
  resources:
    requests:
      storage: 5Gi
The following files are required for build and deployment.
.env
DB_HOST=${DB_HOST}
DB_USER=${DB_USER}
DB_PASSWORD=${DB_PASSWORD}
DB_NAME=${DB_NAME}

WORDPRESS_DB_HOST=${WORDPRESS_DB_HOST}
WORDPRESS_DB_USER=${WORDPRESS_DB_USER}
WORDPRESS_DB_PASSWORD=${WORDPRESS_DB_PASSWORD}
WORDPRESS_DB_NAME=${WORDPRESS_DB_NAME}
WORDPRESS_TABLE_PREFIX=${WORDPRESS_TABLE_PREFIX}
.gitlab-ci.yml
stages:
  - build
  - deploy
  - after_deploy

#Add build and deploy stages depending on your Kubernetes settings
build:
...

deploy:
 ...

after_deploy:
  stage: after_deploy
  image: ${DOCKER_IMAGE}
  only:
    - main
  script:
    - NAME_WP_POD=$(kubectl get pods --sort-by=.metadata.creationTimestamp | awk '{print $1}' | awk 'END{print}')
    - STATUS_POD=$(kubectl get pods ${NAME_WP_POD} --no-headers -o custom-columns=":status.phase")
    - echo $STATUS_POD
    - echo $NAME_WP_POD
    - while [ "$STATUS_POD" != "Running" ]; do sleep 5; NAME_WP_POD=$(kubectl get pods --sort-by=.metadata.creationTimestamp | awk '{print $1}' | awk 'END{print}'); STATUS_POD=$(kubectl get pods ${NAME_WP_POD} --no-headers -o custom-columns=":status.phase"); done;
    - NAME_WP_POD=$(kubectl get pods --sort-by=.metadata.creationTimestamp | awk '{print $1}' | awk 'END{print}')
    - kubectl exec ${NAME_WP_POD} -- bash -c "chown -R www-data:www-data /var/www/html/wp-content/"
When changes are received in the branch (in this case, main), build and deployment will start.
After deployment, the newly launched pod is defined and the owner of the folder /var/www/html/wp-content/ will be changed to www-data.
Add a backup script.
This script is used for site backup.
#!/bin/bash

set -e

export DEBIAN_FRONTEND=noninteractive

apt-get update
apt-get install awscli -y
apt-get install default-mysql-client -y

export TIMESTAMP=$(date +'%Y%m%d')

mysqldump -h $WORDPRESS_DB_HOST -u $WORDPRESS_DB_USER -p$WORDPRESS_DB_PASSWORD --no-tablespaces $WORDPRESS_DB_NAME > backupdb_$TIMESTAMP.sql

tar cvzf backup$TIMESTAMP.tar.gz /var/www/html/wp-content/uploads /var/www/html/wp-content/plugins /var/www/html/wp-content/themes backupdb_$TIMESTAMP.sql

aws s3 cp ./backup$TIMESTAMP.tar.gz s3://$S3_BUCKET
The script creates an archive from copies of the folders and a dump of the database.
In this case, we use the same docker image for the cron job and deploying the WP site.
If your OS is not Debian 11 (like in this example) you have to change the install method awscli and mysql-client suitable for your OS.
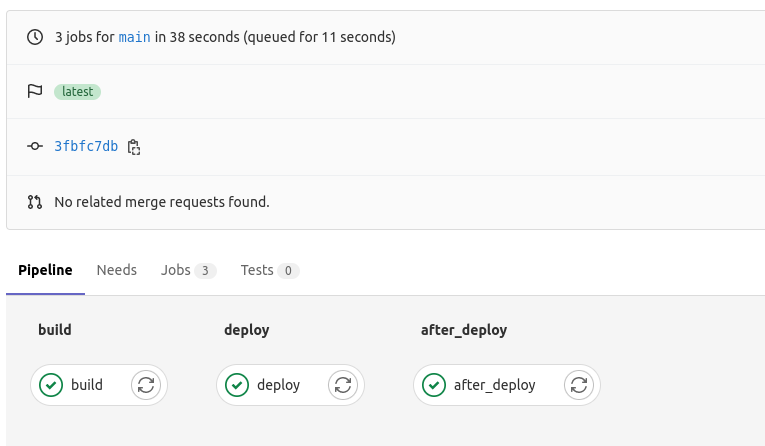
Start CI/CD
Make sure that the CI/CD works without errors.
This command helps you verify that all objects exist and work properly.
kubectl get podNAME READY STATUS RESTARTS AGE
name-pod-758f8c5468-pmr9w 1/1 Running 0 18skubectl get pvcNAME STATUS VOLUME CAPACITY ACCESS MODES STORAGECLASS AGE
name-pvc-claim Bound name-volume 100Gi RWX nfs 18sNow we need to copy the folders (plugins, themes, uploads) to Persistent Volume Claim and assign the owner to this folder user www-data.
Use the following commands:
kubectl cp ./wp-content/themes/ ${NAME_WP_POD}:/var/www/html/wp-content/themes/kubectl cp ./wp-content/uploads/ ${NAME_WP_POD}:/var/www/html/wp-content/uploads/kubectl cp ./wp-content/plugins/ ${NAME_WP_POD}:/var/www/html/wp-content/plugins/kubectl exec ${NAME_WP_POD} -- bash -c "chown -R www-data:www-data /var/www/html/wp-content/"Kubernetes cron job for backup
Create a user in AWS IAM with permission to write to the S3 bucket and an s3 bucket for storing backup archives.
Before creating a secret, check if the user can have enough permissions to copy files to the s3 bucket.
Manually create a Secret containing multiple key-value pairs
Example:
kubectl create secret generic name-your-secret --from-literal=S3_BUCKET='value' --from-literal=AWS_ACCESS_KEY_ID='value' --from-literal=AWS_SECRET_ACCESS_KEY='value'For backup add the following manifest to the deployment.yml file with describes a Kubernetes cron job.
apiVersion: batch/v1beta1
kind: CronJob
metadata:
  name: ${PROJECT_NAME}
spec:
  successfulJobsHistoryLimit: 2
  failedJobsHistoryLimit: 1
  schedule: "0 23 * * 5"                   #Set the value you want
  jobTemplate:
    spec:
      template:
        spec:
          restartPolicy: OnFailure
          containers:
          - name: ${PROJECT_NAME}
            image: ${REPOSITORY_IMAGE}
            envFrom:
            - secretRef:
                name: name-your-secret     #Set the value of the generated secret
            env:
            - name: WORDPRESS_DB_HOST
              value: ${WORDPRESS_DB_HOST}
            - name: WORDPRESS_DB_USER
              value: ${WORDPRESS_DB_USER}
            - name: WORDPRESS_DB_PASSWORD
              value: ${WORDPRESS_DB_PASSWORD}
            - name: WORDPRESS_DB_NAME
              value: ${WORDPRESS_DB_NAME}
            imagePullPolicy: IfNotPresent
            args:
            - /bin/bash
            - -c
            - bash /opt/scripts/backup.sh;
            volumeMounts:
            - name: ${CI_PROJECT_NAME}
              mountPath: /var/www/html/wp-content/uploads
              subPath: "uploads"
            - name: ${CI_PROJECT_NAME}
              mountPath: /var/www/html/wp-content/plugins
              subPath: "plugins"
            - name: ${CI_PROJECT_NAME}
              mountPath: /var/www/html/wp-content/themes
              subPath: "themes"

          volumes:
          - name: ${PROJECT_NAME}
            persistentVolumeClaim:
              claimName: name-pvc-claim
In this manifest, we assign the same persistent volume claim as for the site’s WP with the same volumes. It is necessary in order to be able to make a copy of the folders.
Make changes and check if the cron job was created.
kubectl get cronjobNAME SCHEDULE SUSPEND ACTIVE LAST SCHEDULE AGE
name-cronjob 0 23 * * 5 False 0 0 15sIn the cron job, edit the schedule to start the script every 10 minutes to check how the script works (for testing purposes).
kubectl patch name-cronjob -p '{"spec":{"schedule": "*/10 * * * *"}}'Check the created pods and their logs
kubectl get podNAME READY STATUS RESTARTS AGE
name-pod-1677508500-5mcfn 0/1 Completed 0 5m
name-pod-758f8c5468-pmr9w 1/1 Running 0 1hAfter the cron job works correctly, you should see the status of the job “Completed” and Redy “0/1”.
Now let’s check the logs of the pod with the cron job started.
kubectl log name-pod-1677508500-5mcfnBelow is a sample part of the logs that you should see when the pod is working properly.
/var/www/html/wp-content/themes/twentytwentythree/templates/archive.html
/var/www/html/wp-content/themes/twentytwentythree/templates/blank.html
/var/www/html/wp-content/themes/twentytwentythree/templates/index.html
/var/www/html/wp-content/themes/twentytwentythree/templates/home.html
/var/www/html/wp-content/themes/twentytwentythree/templates/blog-alternative.html
/var/www/html/wp-content/themes/twentytwentythree/templates/search.html
/var/www/html/wp-content/themes/twentytwentythree/templates/404.html
backupdb_20230303.sql
upload: ./backup20230303.tar.gz to s3://name-your-bucket/dname-your-folder/backup20230303.tar.gz
Also, do not forget to check the presence of the created archive in the s3 bucket.
After checking, set the value of the schedule to the previously set value.
kubectl patch name-cronjob -p '{"spec":{"schedule": "0 23 * * 5"}}'Onix Internal

The results of Starlink testing at Onix’s office(prepared by the infrastructure administrator) Starlink testing took place on November 28 from 11:00 a.m. to 8:00 p.m. According to statistical data, 180-200 unique IP addresses participating in the testing. During the testing, they downloaded 219 GB and transmitted 39 GB of data. This amounts to 258 GB […]
Onix Internal

Recently, more and more users are using multiple cloud resources to host their applications their corporate resources. According to this situation for multi-cloud systems need a multi-cloud tool for monitoring. One example of such a universal monitoring system could be New Relic. Especially after the last update (to New Relic ONE), which allows you to […]